Optimize Pro Tools: Proper Session Backup
Jul 12, 2010Until you have had a hard drive failure or “accidentally” deleted your Pro Tools sessions where all your hard work is lost, tips like proper session backup seem boring and a waste of your time. If you haven’t had issue with lost recording then pay attention to this post because I don’t want you to ever experience that!
My hardest lesson learned was thinking that I actually was backing up my sessions properly. What I would typically do was record everything, and then when we were finished for the day I would simply close out of Pro Tools, find the session on my hard drive and physically drag a copy of the session folder to my backup drive. I figured “I know have two copies of the sessions. No problem” The problem arose when I actually lost some files and needed to access my backup only to find that despite having the audio saved to another drive, it was still looking for information from my old drive and the session was confused as to where each audio region was supposed to be in the timeline. This became a major headache very quickly.
What I’m going over real briefly today is the officially sanctioned procedure for file backup (and even preparation for session transfer to someone else) by Avid themselves. It’s super easy, so there is no reason NOT to do this:
1. Save Copy In
With the desired session still open in Pro Tools, simply head to the FILE menu and choose FILE – SAVE COPY IN.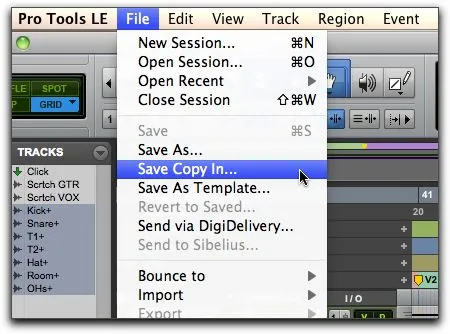 This will open up a new dialog box giving you a ton of options and settings to choose from, which brings us to our second step…
2. Include All Audio Files
In this dialog box, most everything will be set the way you would want. Pro Tools by default will have the latest Pro Tools session type set, as well as the current audio file type, sample rate and bit depth of your current session (assuming you want to keep that the same for your copy). What isn’t selected by default however is the option to include all the actual audio you recorded. This is a no brainer, check that darn box now!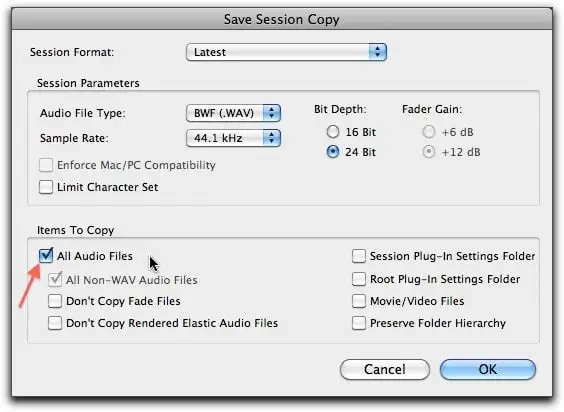
3. Name It and Save It
Finally you’ll be asked to name the copy of your session (labeled “Copy of …” by default) and give a location to be saved. This is obviously where you’ll want to select your separate backup hard drive as the final location. After click the OK button, Pro Tools will start copying everything over to the new session copy and you will be left with a neat and clean session copy with it’s own audio files.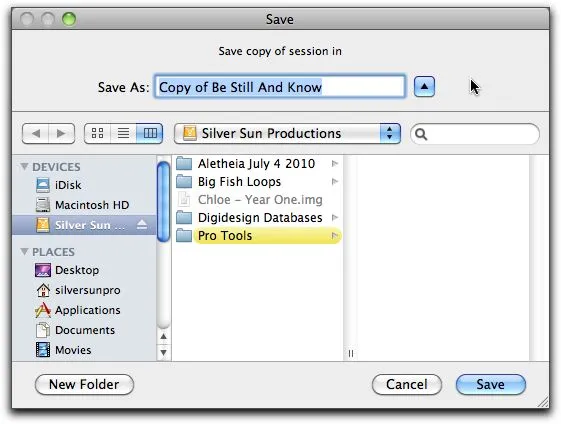
That’s It!
The benefit to backing up your sessions in this fashion is that you get a completely unique and self contained session copy that isn’t “looking” to any other hard drive or disk allocation in order to function. You could burn and mail this, upload this to your FTP server, or simply re open it later if the original session is lost all without any hassle. Do this from now on and just know that you’re doing the right thing…especially if you are working with paying clients!
Discover The 6 Steps for Creating a
Radio-Ready Song from Scratch"
Enter Your Email Below To Receive The Free 17-page PDF,
"6 Steps To A Radio-Ready Song"
We hate SPAM. We will never sell your information, for any reason.
