The Glyn Johns Drum Recording Method
Jan 10, 2011When we think of professional drums being recorded in a studio our mind usually draws up images of complex mic techniques utilizing anywhere from 8 to 12 (or more) microphones.
A combination of stereo overheads, close mics on each drum, as well as room mics seems to be the doctor’s orders for a modern, punchy drum sound. But today I want to highlight a famous technique for recording big drum sounds with minimal mics (4 to be exact), the Glyn Johns method.
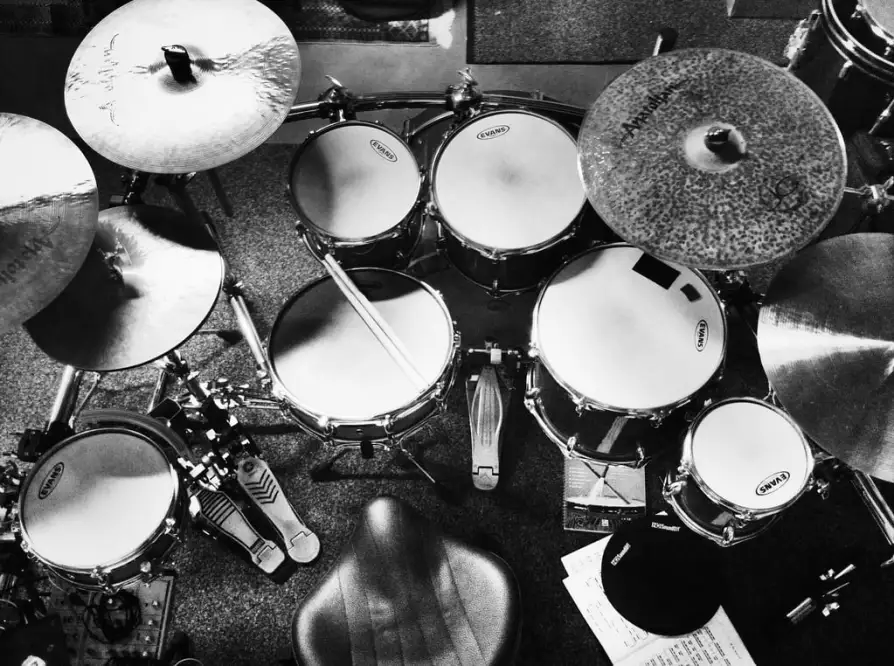
Via Dave Kobrehel Flickr
Who Is Glyn Johns?
Glyn Johns is a british musician, engineer, and producer who most notably worked with Led Zeppelin, The Who, The Rolling Stones, The Eagles, Eric Clapton, and even started his career assisting for The Beatles. He really made a name for himself in the annuls of recording legend with his monstrous John Bonham drum sounds on all those Zeppelin records. And the kicker…he only used 4 microphones to do it!
Specifically all you need for this method are 2 overhead mics (ideally large diaphragm condensers), one kick mic (dynamic or condenser), and one snare mic (usually a dynamic). The big picture is that the sound comes from the overheads while the kick and snare mics act as “spot” mics to fatten up those two huge elements of the kit and give you a bit more to mix with.
But before you think this is nothing special, you have to realize that the way these two “overhead” mics work together is very unusual and is part of what makes the Glyn Johns method so interesting. Let’s take a look…
It Starts With One Mono Overhead
If you saw last week’s post on makeshift acoustic treatment then you may have noticed the positioning of my drum overhead mics. We used the Glyn Johns method on the drums for this project and it really worked well.
The method starts with taking your first overhead mic and placing it about 3 to 4 feet directly above the snare (or middle of the kit). It should be pointing down at the kit. Record a little bit and listen back to that one mic. You are listening for a complete balance of the kit. You want to hear a nice blend of snare, toms, and cymbals all in one mic. If you have don’t have enough of the hi and mid toms, then angle the overhead a bit towards the toms. If the cymbals are too abrasive, move the mic up a bit more. Rinse and repeat.
Now For Something Completely Different
Once you have a good balance of the kit with your first mic, things get a bit interesting. Take your second overhead mic and place it just to the right of your floor tom, maybe 6 inches above the rim and facing across the the tom towards the snare and hi hat. As you can see this “overhead” mic isn’t overhead at all, rather it is a side fill mic capturing the kit from a different perspective.
The key to getting this mic in phase with your first overhead mic is to make sure that the grill of the micrphone is exactly the same distance from the center of the snare as the first overhead mic. Simply take a mic cable, have your drummer hold one end of it firmly to the center of the snare as you stretch the cable up to the first overhead and pinch off the distance. Then with your drummer still holding his end firmly to the snare, swing the cable over to the second mic and make sure that mic is lined up with where you are pinching it.
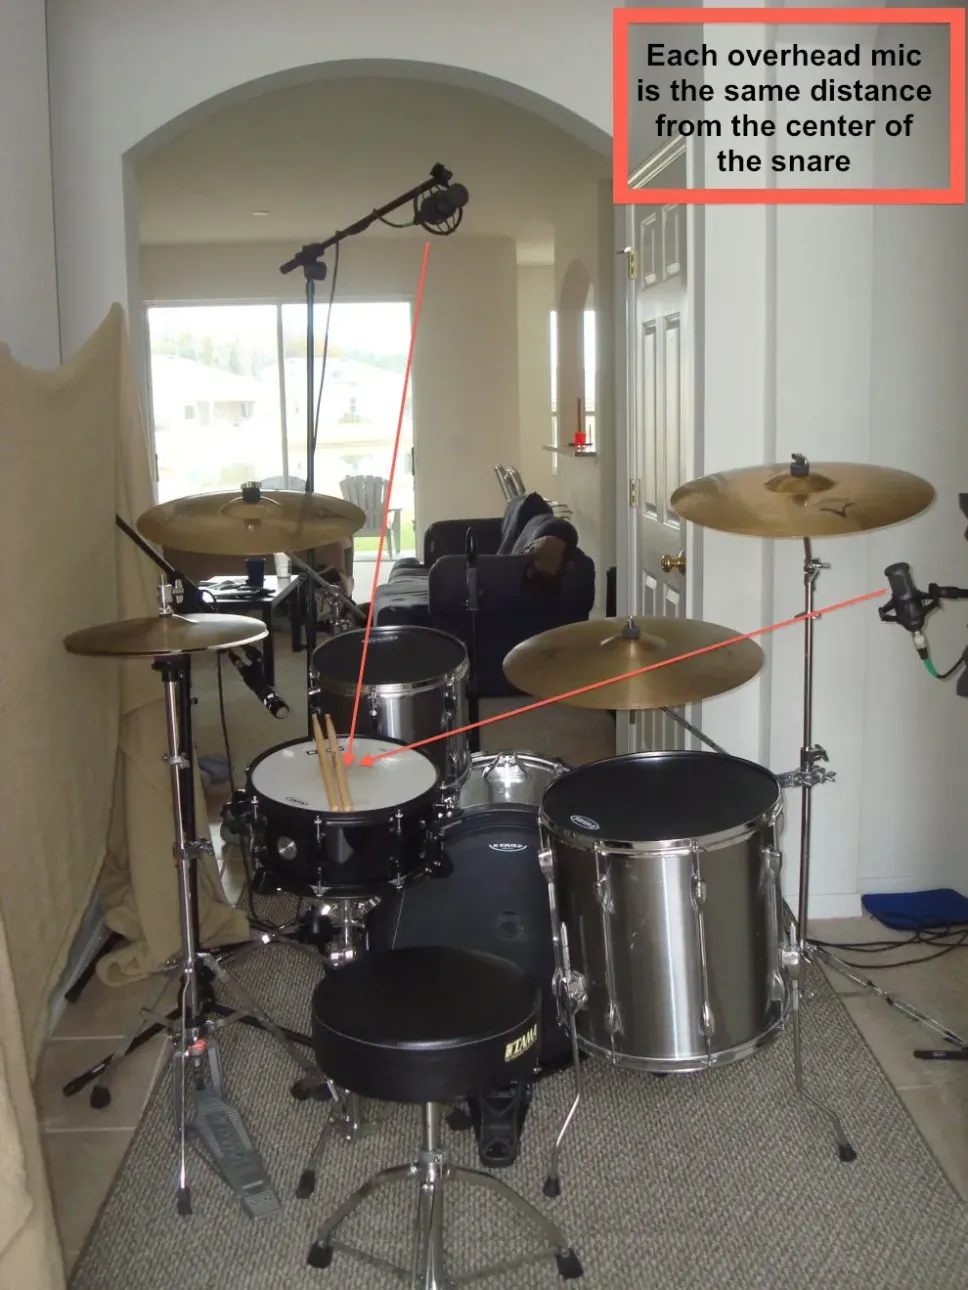
When panned, these two microphones alone should give you a completely balanced, clear, and punch stereo recording of your kit. You should hear the crack of the snare in the center, cymbals all around, and toms punchy and clear. What you will however lack is some obvious low end punch to the kick and some fatness to the snare. That’s where the final two spot mics come into play.
Kick And Snare To Round Things Out
With your overheads sounding good, things get simple. Grab your kick mic and place it close to the resonant head or inside the drum. Place it where you get that fullness and attack that you want to compliment your first two mics. With the snare, place your mic a couple of inches above the rim angled across the snare. Experiment with the angle of this mic for big differences in sound. Adjust these two mics to taste to round out your drum sound. Remember, you already will have the kick and the snare in your overhead mics to some degree so these two close mics should bring what is missing from that initial sound.
Final Thoughts To This Method
Some things to keep in mind with the Glyn Johns method (and really with any method of recording drums):
- New drum heads (beater and resonant) are a must to getting the best tones out of your kit. For not much money new heads can guarantee dramatically better drum recordings.
- Where you record really affects the sound. To get that classic big Bonham drum sound that Johns was made famous for you need to record in a big sounding room. Of course even in a smaller space, you can get a great sound. The better the room sounds though, the better your recordings will sound.
- There are no rules. Use this method as a starting point for your recordings if you like. But move things around, experiment, change it up. Rumor has it that this method was discovered by accident anyways, so don’t be afraid of “screwing things up”.
That being said, here is a sample of our drums from last week’s recording. This drum kit was tracked in the foyer of a house using the traditional Glyn Johns method. Mics used were Kel HM-1s for overheads, a Kel HM-2d outside the kick, and a Shure SM-57 over the snare. This is just a raw bounce out of Pro Tools. Enjoy!
[audio:GlynJohnsDrums.mp3|titles=Example of Glyn Johns Drums Method|artists=Performed by Gabe Steelman]
Discover The 6 Steps for Creating a
Radio-Ready Song from Scratch"
Enter Your Email Below To Receive The Free 17-page PDF,
"6 Steps To A Radio-Ready Song"
We hate SPAM. We will never sell your information, for any reason.
