The Reality Of Getting A Great Drum Recording At Home (Hint: It Takes Time)
Sep 08, 2014If I told you it took me 7 hours to record only 7 minutes of drums the other day, what would you say?
While some might think that a quick pace, the majority of you would consider me a slow poke (or an inept engineer).
Why in the world would I spend 7 hours only to capture 7 minutes of actual drum recording? Am I a crazy perfectionist? Or majorly indecisive?
Or is this simply what it takes to get a pro drum track at home?
My Step By Step Workflow
To get drums sounding the way I want them to sound, with all the “limitations” of a home studio, it takes time. Period.
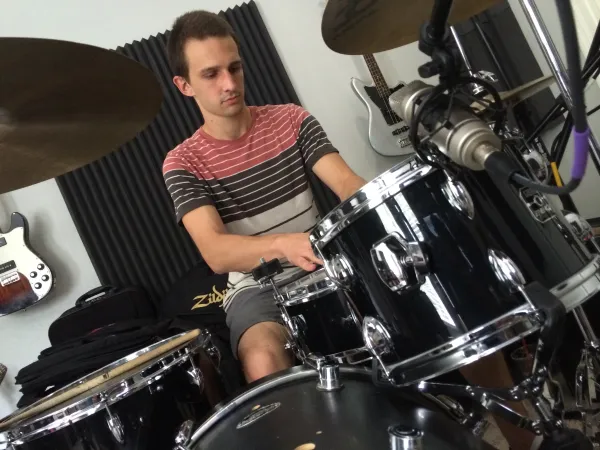
That proved to be true yet again last week when I had a “simple” tracking session for a drummer friend. He was hired to play drums on two songs for an up and coming singer/songwriter and he needed a place to do it and someone to engineer.
All we needed was about 7 minutes of audio – which basically took all day.
I thought it might prove helpful to many of you home studio peeps to get a feel for what goes into my drum tracking workflow, so here’s what went down last week.
The Foundation: Tuning The Drums
The very first thing we did was (obviously) set up the drummers’ kit. While he’s getting things in place (and getting comfortable) I was starting to get mics hooked up and prepared.
But the first REAL step in getting a great drum sound in the studio is tuning. Good old fashion tuning.
Before we spent even a minute of our time miking the kit – we tuned. And boy did we tune.
Even if you don’t know a single thing about drum tuning, the process is super simple. The heads (both beather and resonant) on any drum can be tightened or loosened, thus changing the pitch, tone, and vibe of the drum.
We basically tweaked the snare, kick, and toms until everything sounded amazing in the room. Literally it had to sound good to our ears just sitting in the room.
The kick drum had that empty beach ball sound when he hit it, and honestly no tuning was fixing that. So we simply stuffed it with t-shirts and towels. Problem solved.
The snare was small and thin so we loosened it a bit. It got better, but in the end we swapped it out entirely for a backup snare that just sounded fatter.
This entire step is a boring and unsatisfying one – in the moment. But it is so encouraging to know that before you’ve even reached for a mic, you’ve got one good sounding drum kit in real life.
The Right Mics In The Right Place
Once the kit was sounding legit we moved onto the actual mic choice and placement.
Now I rarely start completely from scratch since I’m working in my own studio with my own microphones (both of which I know well), so in this session I placed 8 microphones in some rough starting points with a fair amount of confidence.
Two things we did change after some initial tracking and listening back (which you’ll have to do a lot of by the way) was adjust the placement of the overhead mics and swap out a kick drum mic.
First, the overheads. I was using a classic Glyn Johns overhead placement, but the right side overhead was simply too close to the floor tom, making it overpowering.
The solution was to switch to more of a Recorderman approach, moving that mic to over the drummer’s shoulder. This took some trial and error, but we got there.
Secondly, the outside kick drum mic I had originally chosen was simply not sounding right. It didn’t have the air and clarity I wanted, so I swapped it out for a mic that has a different frequency response. Much better.
Record A Little, Listen Back, Rinse And Repeat
As I mentioned briefly, the key to knowing whether the mics are in the right place is simple: record a bit, then listen back and analyze.
This isn’t rocket science folks. Anyone can do this.
We would listen back and spend a moment focusing on each element of the kit. Did we like the kick drum sound? Did it have enough low end punch plus beater clarity?
Does the snare have enough air and fattness? Do the crash cymbals take wash out the overheads too much? Are the toms flappy or punchy?
We spent a couple of hours in this process. Why do this when it seems like overkill?
Because once you KNOW the kit sounds amazing when you press record, you can stop thinking in “engineer” left brain mode and move on to the “producer” right brain mode which is so critical to getting a great drum recording.
Produce A Great Performance
The final step to getting a great drum recording in the home studio is to produce it.
That’s exactly what we did last week. As soon as we were satisfied with how the drums were tracking sonically, we shifted hats and began analyzing the drum arrangement and performance.
We asked questions like: How busy should the kick drum be in verse 1? Should we go to the ride cymbal or open hi hat in the chorus? Should you do 16th notes during that build or a tom fill?
This took a long, long time – for only two songs (3.5 minutes each).
But it was totally worth it.
Every moment in these drum recordings felt right – not too much, not too little, and right in the pocket.
Remember, the best sounding drum recording in the world is a total fail if the performance is lame or mismatched to the song.
No One Will Know How Long It Took – But Everyone Will Know How Good It Sounds
When I got “home” from work – all I could tell my wife that I did that day was record 7 minutes of drums.
She (and the rest of the music consuming public) might not really know all that goes into recording drums, and might find it mind boggling that we spent 7+ hours working our butts off for those 7 minutes of precious audio – but I don’t care, because everyone who hears it knows that it sounds good.
And ultimately that’s what matters. That’s the ONLY thing that matters in the recording world – does it sound good, both sonically and musically.
It doesn’t matter how long it takes, what gear you used, or what techniques were implemented. Nobody cares.
All anyone cares about is sound.
And the great news is – you can get a great drum sound in the home studio with a modest budget. I do it year in and year out, and so do many others.
There simply aren’t anymore excuses (which should be an encouraging thing) – so get out there, have fun, and make a great sounding drum recording!
Discover The 6 Steps for Creating a
Radio-Ready Song from Scratch"
Enter Your Email Below To Receive The Free 17-page PDF,
"6 Steps To A Radio-Ready Song"
We hate SPAM. We will never sell your information, for any reason.
